Old Product Code: MYA-21-52.4Y.B New Product Code: WL-101-1013
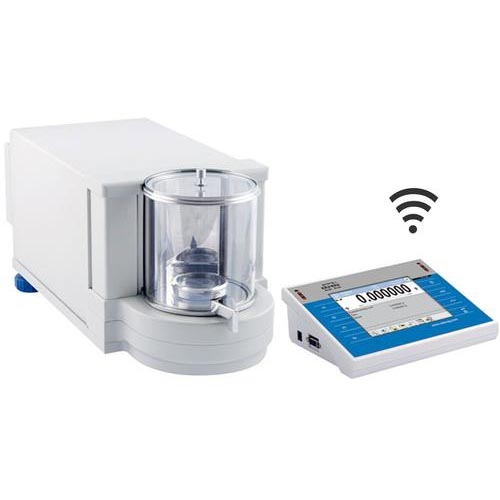
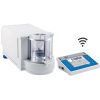
Microbalance is designed to meet the highest requirements for determination of mass. Measurement reliability and accuracy are maintained by system of automatic internal adjustment/calibration. Microbalance comprises two major components (an electronic module and a precise mechanical measuring system which are enclosed separately). The device design eliminates an influence of heat sourcing from instruments electronics on its mechanical components and additionally protects it from shocks and vibrations caused by users operating the instrument.
Features and Benefits
- Electronic Level Indicator:
- Functions:
- Alarm function
- graphic level indicator
- programmable acceptable tilts
- Data Exchange Through USB Storage Devices
- Update Balance Software
- Export Weighing Data
- Export/Import Databases
- Export/Import Balance Settings
- Exchange Data Between Balances
- Infrared Proximity Sensors
- Optional Functions:
- Print function
- Tare function
- Sensor’s sensitivity adjustment
- Communication Interfaces
- Ethernet
- 2ЧRS 232
- 2ЧUSB
- Additional display port
- Portability
- Extra Option: Balances with a wireless terminal
Functions
- Autotest: Diagnostic function aiming at metrological parameters determination (repeatability), the parameters are determined for the actual conditions of use. When speaking of repeatability it may be also used for weighing time optimization. Autotest is operated in an automatic mode thus operator’s time is saved.
- Checkweighing: Checkweighing function is used for checking whether the measured sample mass is within the predefined threshold values, Low [LO] and High [HI]. The thresholds are given in [g] and [kg] units. Current state of a sample being measured is signaled by means of pictograms located on a display for laboratory balances, for industrial scales Stack light System is used. This visual, inspection is in operation during segregation, control or packing process of products for which mass has bees determined with a specifaied tolerance, e.g. 12860 g 961
- Dosing: Weighing process for which reference mass has been determined together with tolerance for its determination. Dosing tolerance is given in [%] and it is calculated in relation to the reference value thus being a permissible deviation of this process. This solution is used for weighing powders, liquids and loose materials. Dosing function performance is often supported with bargraph – load indicator. For industrial scales it is possible to use a control systems of dosing process
- Pipettes Calibration: Function verifying correctness of piston pipettes functioning, the verification is performed via gravimetric measurement of the excreted liquid. Pipettes calibration may be either a stand-alone module or it may be operated
- Air Density Correction: Function performing correction of mass measurement indication, wherein the air density is taken into account. It is used in balances with reading unit <, 0,01 mg.
- Parts Counting: Function using mass measurement for determination of measured items quantity. Mass of a single item is required for this process. It may be either estimated through weighment or taken from a database. For items counting the following algorithm is used: all items mass/single item mass = quantity. Function operation is supported by a mechanism of automatic correction of accuracy. This allows to update single item mass in course of the process. To a certain extend Automatic Correction of Accuracy eliminates error which may be a result of different mass values of seemingly alike single elements. For industry solutions items counting may be simultaneously carried out with Checkweighing and dosing thus industry solutions feature audio signaling base informing that specified number of items has been weighed. It is possible to apply weighing systems using few platforms of different MAX capacities and different accuracies.
- Percent Setup: Percent setup function is used for comparison of measured products with mass standard. Mass of a mass standard may be a numeric value taken from a database or it may be determined through a measurement process. Each measured product is compared to mass standard, mass of which is presumed as a model 100% ideal mass. For products weighing less than the mass standard, obtained results are lower than 100%, for products weighing more, the obtained results are greatly excessed.
- Newton Unit Measurement: Function allowing to perform the measurement in Newton unit, it may be used for processes aiming to determine force resulting in the sample damage
- GLP Procedures: Diagnostic function allowing to objectively document performed measurements. GLP procedures may be either presented in a short report form or extended one.
- ALIBI Memory: The used ALIBI memory is a data secure area and allows to record up to 100 000 weighment records. It ensures security of constant data register in the long time period.
- Formulation: Function supporting the mixture making process, wherein the mixture contains various components. Formulation function usually uses the balance/scale database of components. Formulation serves for monitored Checkweighing of every single component with a given tolerance. It is enriched with a set of individual settings.
- IR Sensors: Programmable function supporting the weighing process through control of the following options: sliding weighing chamber doors, printout, zeroing, tarring etc. Especially appreciated wherever preventing the balance from soiling is important
- Statistics: Statistics function registers and analyses performed measurements. This supplies the user with the following information: Max and Min standard deviation, average value, variance, range et.
- Animal Weighing: Process of mass determination for a product which may unwillingly reposition within the weighing pan. Mass determination in such cases requires much longer period of time when compared to typical weighing process. It is the user who defines period of time needed for control of measured product mass. The user can thus optimize the function depending on the measured product characteristics.
Technical Specifications
- Capacity x Readability: 21g x 1µg (52g x 10µg)
- Tare range: -52g
- Linearity: ± 10/30µg
- Eccentric load deviation: 6/10µg
- Repeatability: 2µg
- Sensitivity offset: 3 x 10⁻⁶ x Rt
- Sensitivity temperature drift: 1×10⁻⁶/єCЧRt
- Sensitivity stability: 1×10⁻⁶/YearЧRt
- Minimum weight (USP): 3.6mg
- Minimum weight: 0.4mg
- Pan size: ш 26mm, ш 40mm
- Weighing chamber dimensions: ш 90 x 90mm
- Stabilization time: max 10s
- Working temperature: +10 ч +40°C
- Working temperature change rate: ±0,3°C/h (±1°C/8h)
- Adjustment/Calibration: Automatic (internal)
- Atmospheric humidity: 40% ч 80%
- Atmospheric humidity change rate: ±1%/h (±4%/8h)
- Display: 5.7′ color resistive touch screen
- Power supply: 13.5 ч 16V DC/700mA
- Casing of the terminal: ABS plastic
- Processor: 2 x 1 GHz
- Memory: RAM: 256MB DDR2, flash: 8GB micro SD
- Interface: 2ЧUSB, 2ЧRS 232, Ethernet, 4Inputs/4Outputs, Wireless Connection
- Net weight/Gross weight: 10.2/14.7kg
Warranty Information:
- 2-Year Warranty

