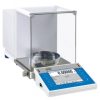
The XA 4Y.A Series Analytical Balance features a new 5.7” color touch screen display – a modern interface for balance operation and measurement presentation. It enables customized parameter selection along with user profiles. A distinguishing feature of the XA 4Y.A is the automatic side glass doors with infrared proximity sensors located on the terminal. The XA 4Y Series also includes an internal automatic adjustment system using a built-in mass standard. The balance level is monitored by LevelSENSING system, a RADWAG patented solution including an electronic level. The 4Y Series has standard online monitoring of ambient conditions using either internal sensors or the external THB 3 series module. The XA 4Y Series includes a large weighing chamber protected by an anti-draft shield from ambient conditions – this also ensures cleanness of the chamber interior. The weighing chamber design enables fast and easy disassembling of its glass parts thus ensuring clean weighing area and sterility. The interactive mode of the XA 4Y Series guarantees speed and reliability for formulations based on data acquired from balance databases. Differential weighing mode facilitates incremental counting processes. Extended databases enable a user to keep records of all acquired measurements, additionally, data export and printing is available. A newly implemented pipette calibration mode supported by a dedicated adapter forms an ergonomic tool for calibrating and checking of piston pipettes by means of a gravimetric measuring method. Due to standardized and customizable printout formats, a user can design and document practically any process in accordance with the requirements of GLP/GMP methods. The balance also features an independent mass control mode compatible with automatic feeder PA-02/H Series.
Features and Benefits:
- Innovative 2-point adjustment system
- Brand new adjustment system guarantees the highest measurement accuracy. It minimizes linearity errors simultaneously providing reliable indications for the whole weighing range.
- Faster measurement with the new CPU
- 4Y balances feature Dual Core 2 x 1 GB processor which delivers noticeable performance improvements including faster operation and shorter stabilization time retaining high repeatability values.
- Monitoring and Elimination of Electrostatics
- Installation of an additional deionizer module in a weighing chamber facilitates automatic detection and elimination of electrostatics effect to which both, sample and container intended for measurement may be subjected.
- 8 GB RAM – more data management possibilities
- 8 GB RAM offers possibility of recording data in a form of complex reports. Time and statistic data diagrams on series of weighments are another useful option.
- The best possible repeatability and USP regulations conformity
- The best weighing accuracy and repeatability – with sd 1d combined with USP regulations conformity (Section 41 and 1251) make 4Y balances a new standard for mass measurement quality.
- Ergonomics and safety
- Wireless communication between balance terminal and a weighing unit make it possible to comfortably operate 4Y series balances in laminar air flow cabinets and fume cupboards.
- Remote Control Operation
- WiFi module offers wireless transfer of data recorded by 4Y balance to any portable device powered by iOS or Android systems using special applications intended for data management.
- Data Safety
- Every single 4Y balance features ALIBI memory designed to provide protection and automatic recording of your measurements. Options such as data preview, copying and archiving are also available to users
Functions
- Autotest: Diagnostic function aiming at metrological parameters determination (repeatability), the parameters are determined for the actual conditions of use. When speaking of repeatability it may be also used for weighing time optimization. Autotest is operated in an automatic mode thus operator’s time is saved.
- Checkweighing: Checkweighing function is used for checking whether the measured sample mass is within the predefined threshold values, Low [LO] and Hgh [HI]. The thresholds are given in [g] and [kg] units. Current state of a sample being measured is signaled by means of pictorgams located on a display for laboratory balances, for industrial scales Stacklight System is used. This visual +/- inspection is in operation during segregation, control or packing process of products for which mass has bees determined with a specified tolerance, eg. 12860 g 961
- Dosing: Weighing process for which reference mass has been determined together with tolerance for its determination. Dosing tolerance is given in [%] and it is calculated in relation to the reference value thus being a permissible deviation of this process. This solution is used for weighing powders, liquids and loose materials. Dosing function performance is often supported with bar graph – load indicator. For industrial scales it is possible to use a control systems of dosing process.
- Pipettes Calibration: Function verifying correctness of piston pipettes functioning, the verification is performed via gravimetric measurement of the excreted liquid. Pipettes calibration may be either a stand-alone module or it may be operated.
- Air Density Correction:Function performing correction of mass measurement indication, wherein the air density is taken into account. It is used in balances with reading unit
- Parts Counting: Function using mass measurement for determination of measured items quantity. Mass of a single item is required for this process. It may be either estimated through weighment or taken from a database. For items counting the following algorithm is used: all items mass / single item mass = quantity. Function operation is supported by a mechanism of Automatic Correction of Accuracy. This allows to update single item mass in course of the process. To a certain extend Automatic Correction of Accuracy eliminates error which may be a result of different mass values of seemingly alike single elements. For industry solutions items counting may be simultaneously carried out with checkweighing and dosing thus industry solutions feature audio signalling base informing that specified number of items has been weighed. It is possible to apply weighing systems using few platforms of different MAX capacities and different accuracies.
- Percent Setup: Percent setup function is used for comparison of measured products with mass standard. Mass of a mass standard may be a numeric value taken from a database or it may be determined through a measurement process. Each measured product is compared to mass standard, mass of which is presumed as a model 100% ideal mass. For products weighing less than the mass standard, obtained results are lower than 100%, for products weighing more, the obtained results are greatly excessed.
- GLP Procedures: Diagnostic function allowing to objectively document performed measurements. GLP procedures may be either presented in a short report form or extended one.
- Automatic Sliding Door: Door open automatically.
- Formulation: Function supporting the mixture making process, wherein the mixture contains various components. Formulation function usually uses the balance/scale database of components. Formulation serves for monitored checkweighing of every single component with a given tolerance. It is enriched with a set of individual settings.
- IR Sensors: Programmable function supporting the weighing process through control of the following options: sliding weighing chamber doors, printout, zeroing, tarring etc. Especially appreciated wherever preventing the balance from soiling is important.
- Statistics: Statistics function registers and analyses performed measurements. This supplies the user with the following information: Max and Min standard deviation, average value, variance, range et.
- Animal Weighing: Process of mass determination for a product which may unwillingly reposition within the weighing pan. Mass determination in such cases requires much longer period of time when compared to typical weighing process. It is the user who defines period of time needed for control of measured product mass. The user can thus optimize the function depending on the measured product characteristics.
- Density Determination: Liquid or solid body density function uses the Archimedes principle and it requires a special kit to be applied. The kit when used, replaces a weighing pan. For solids mass of the sample must be determined first in the air, next in the liquid of specified density. For liquids the so called sinker, density of which has been determined, must be measured first in the air, next in the tested liquid. The density determination process is disturbed by air bubbles which may stick either to the measured sample or the sinker. In case of laboratory equipment very light solids may be measured. For industry, solid bodies density may be determined by means of under-pan weighing. Tested load of significant size may be measured this way.
Technical Specifications
- Dimensions: 715 x 385 x 485 mm
- Net Weight/Gross Weight: 12.7/16.4 kg
- Maximum Capacity: 310 g
- Readability: 0.1 µg
- Tare Range: -220 g
- Repeatability: 0.01/0.08 mg
- Linearity: ± 0.6 mg
- Eccentric Load Deviation: 0.2µg
- Sensitivity Offset: 2Ч10ЧRt
- Sensitivity Temperature Drift: 1Ч10/°CЧRt
- Sensitivity Stability: 1Ч10/RokЧRt
- Sensitivity Drift: 1ppm/°C in temperature +15 – +35 °C
- Minimum Weight (USP): 20 mg
- Minimum Weight: 2 mg
- Weighing Chamber: 170 x 220 x 220
- Stabilization Time: 4 s
- Pan Size: ш 85 mm
- Working Temperature: +10 – +40 °C
- Atmospheric Humidity: 40% ч 80 %
- Power Supply: 13.5 ч 16 V DC / 700 mA
- Display: 5.7′ Color Resistive Touch Screen
- Adjustment/Calibration: Internal (Automatic)
- Interface: 2ЧUSB, 2ЧRS 232, Ethernet, 4 Inputs/4 Outputs, WiFi 2,4GHz b.g.n
Warranty Information:
- 2-Year Warranty
Documentation:
- User Manual
- SQC in Laboratory


