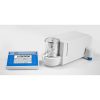
Old Product Code: UYA-6.4Y-PLUS New Product Code: WL-101-0213
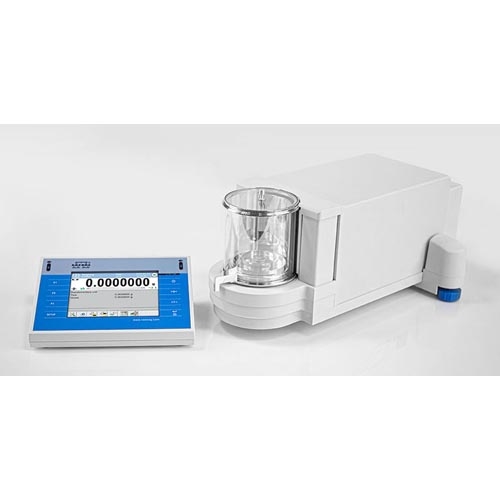
The UYA 4Y PLUS ultra-microbalance is a professional instrument intended for the most demanding applications. The innovative SYNERGY LAB line guarantees the highest quality, precision and reliability. The UYA 4Y PLUS ultra-microbalance features construction solutions ensuring convenient everyday operation. The weighing chamber can be disassembled without tools, which makes cleaning it convenient. Programmable infrared sensors, when respectively set, enable touchless opening and closing of the weighing chamber.
Features and Benefits
- Electronic Level Indicator:
- Functions:
- Alarm function
- graphic level indicator
- programmable acceptable tilts
- Data Exchange Through USB Storage Devices
- Update Balance Software
- Export Weighing Data
- Export/Import Databases
- Export/Import Balance Settings
- Exchange Data Between Balances
- Interfaces
- Ethernet
- 2ЧUSB
- 2ЧRS 232
- 4 in / 4 out
- WiFi 2,4GHz b,g,n
- Infrared Proximity Sensors
- Optional Functions:
- Print function
- Tare function
- Sensor’s sensitivity adjustment
- Optional Functions:
- Portability
- Extra Option: Balances with a wireless terminal
- Reflex Level System
- New auto leveling system PLUS series balances ensures:
- Ground tilt test
- Automatic balance levelling
- Control of the correct balance level
- Confirmation of correct balance level on adjustment and weighing reports
- New auto leveling system PLUS series balances ensures:
Functions
- Autotest: Diagnostic function aiming at metrological parameters determination (repeatability), the parameters are determined for the actual conditions of use. When speaking of repeatability it may be also used for weighing time optimization. Autotest is operated in an automatic mode thus operator’s time is saved.
- Dosing: Weighing process for which reference mass has been determined together with tolerance for its determination. Dosing tolerance is given in [%] and it is calculated in relation to the reference value thus being a permissible deviation of this process. This solution is used for weighing powders, liquids and loose materials. Dosing function performance is often supported with bar graph – load indicator. For industrial scales it is possible to use a control systems of dosing process.
- Percent Weighing: Percent Weighing function is used for comparison of measured products with mass standard. Mass of a mass standard may be a numeric value taken from a database or it may be determined through a measurement process. Each measured product is compared to mass standard, mass of which is presumed as a model 100% ideal mass. For products weighing less than the mass standard, obtained results are lower than 100%, for products weighing more, the obtained results are greatly exceeded.
- Parts Counting: Function using mass measurement for determination of measured items quantity. Mass of a single item is required for this process. It may be either estimated through Weighments or taken from a database. For items counting the following algorithm is used: all items mass / single item mass = quantity. Function operation is supported by a mechanism of Automatic Correction of Accuracy. This allows to update single item mass in course of the process. To a certain extend Automatic Correction of Accuracy eliminates error which may be a result of different mass values of seemingly alike single elements. For industry solutions items counting may be simultaneously carried out with check weighing and dosing thus industry solutions feature audio signaling base informing that specified number of items has been weighed. It is possible to apply weighing systems using few platforms of different MAX capacities and different accuracies.
- Formulation: Function supporting the mixture making process, wherein the mixture contains various components. Formulation function usually uses the balance/scale database of components. Formulation serves for monitored check weighing of every single component with a given tolerance. It is enriched with a set of individual settings.
- Statistics: Statistics function registers and analyses performed measurements. This supplies the user with the following information: Max and Min standard deviation, average value, variance, range et.
- Check weighing: Check weighing function is used for checking whether the measured sample mass is within the predefined threshold values, Low [LO] and High [HI]. The thresholds are given in [g] and [kg] units. Current state of a sample being measured is signaled by means of pictograms located on a display for laboratory balances, for industrial scales stack light System is used. This visual +/- inspection is in operation during segregation, control or packing process of products for which mass has bees determined with a specified tolerance, e.g. 12860 g 961
- IR Sensors: Programmable function supporting the weighing process through control of the following options: sliding weighing chamber doors, printout, zeroing, tarring etc. Especially appreciated wherever preventing the balance from soiling is important.
- GLP Procedures: Diagnostic function allowing to objectively document performed measurements. GLP procedures may be either presented in a short report form or extended one.
- Animal Weighing: Process of mass determination for a product which may unwillingly reposition within the weighing pan. Mass determination in such cases requires much longer period of time when compared to typical weighing process. It is the user who defines period of time needed for control of measured product mass. The user can thus optimize the function depending on the measured product characteristics.
- Air Density Correction: Function performing correction of mass measurement indication, wherein the air density is taken into account. It is used in balances with reading unit <, 0,01 mg.
- Differential Weighing: Differential weighing informs about mass variation a particular sample, wherein the said variation is a result of manufacturing processes. Differential weighing is often applied in product control process, for which reference product parameters have been specified in order to be used as a source of comparison for the whole series. In such case standard deviation is the information which tells about quality and completeness of a final product. For systems based on a feed-back technique such information may be used by control units.
- Statistical Quality Control: Statistical control for determination of basic statistical criteria: maximum, minimum, standard deviation, mean values for each batch, etc.
- Wi-Fi: Wi-Fi offers possibility to send data from balance to a mobile iOS or Android device, via special data management apps. Wireless communication between the indicator and the weighing instrument enables operating the balance that is placed inside a laminar flow hood or a fume cupboard.
Technical Specifications
- Maximum capacity [Max]: 6.1g
- Minimum load: 10µg
- Readability [d]: 0.1µg
- Tare range: -6.1g
- Standard repeatability [5% Max]: 0.2µg
- Standard repeatability [Max]: 0.45µg
- Standard minimum weight (USP): 0.4mg
- Standard minimum weight (U=1%, k=2): 0.04mg
- Permissible repeatability [5% Max]: 0.4µg
- Permissible repeatability [Max]: 0.8µg
- Linearity: ±1.5µg
- Eccentric load deviation: 1.5µg
- Stabilization time: 10 – 20s
- Adjustment: Internal (automatic)
- OIML Class: I
- Display: 5.7′ resistive colour touchscreen
- Communication interface: 2ЧRS232, 2ЧUSB-A, Ethernet, 4 in/4 out (digital), Wi-Fi
- Power supply: 100 ч 240V AC 50/60 Hz
- Power consumption max.: 10W
- Operating temperature: +10 ч +40°C
- Operating temperature change rate: ±0.3°C/1h (±1°C/8h)
- Relative humidity: 40% ч 80%
- Relative humidity change rate: ±1%/h (±4%/8h)
- Weighing chamber dimensions: ш90Ч90mm
- Weighing pan dimensions: ш16mm
- Packaging dimensions: 660 x 660 x 455mm
- Net weight/Gross weight: 9.1kg/16.6kg
Warranty Information:
- 2-Year Warranty

